Facebook has over 1.65+ billion users worldwide.
Did you know that social media engagement improves search engine rankings?
Facebook is the most used social media platform – are you leveraging its power to generate leads?
Having a Facebook page for your business is the best way to access and target this ever-growing user base.
If you don’t already have a Facebook business account, now is the best time to create one.
This article will explain step-by-step how to create a Facebook business page for your company.
Why make a Facebook business page?
Did you know it takes on average seven touches to generate a sale? (Salesforce)
During the sales cycle prospects could:
- Talk to a sales person,
- read an email,
- research online for reviews (inc. Facebook reviews),
- read your blog
- view your social media
- much more
A Facebook business page is easy to setup and monitor and another channel to market.
Creating a solid Facebook business page will boost your credibility in the eyes of customers and scores you brownie points to help you rank more highly in Google.
How To Create And Set Up A Facebook Business Page
Follow these five steps to create, set up, and use a Facebook page for your business.
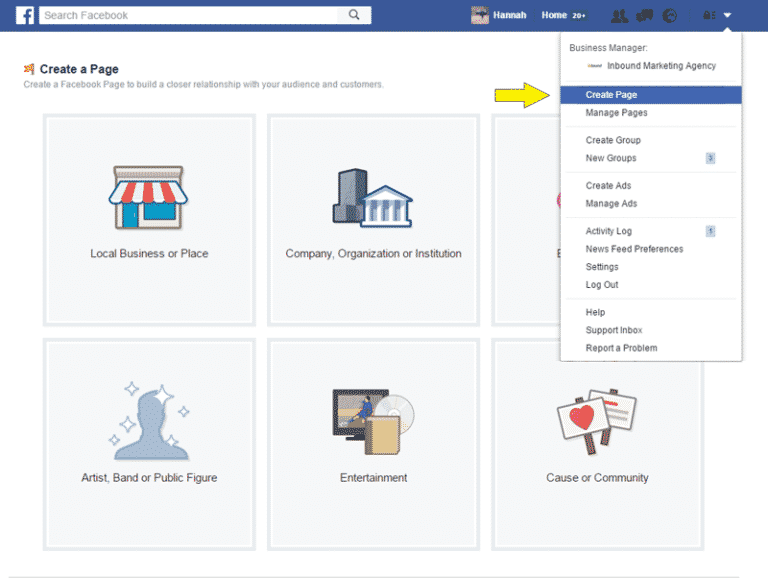
1. Create Page
To create a Facebook business page, you must have a personal Facebook account. Login to your account and then hover over the arrow on the upper right-hand side of the blue bar. Click “Create Page.”
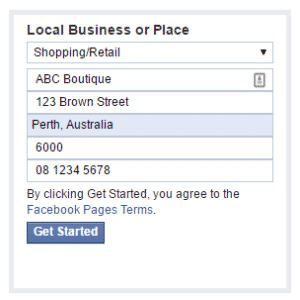
2. Select Category
Select the appropriate category for your business and enter the necessary details.
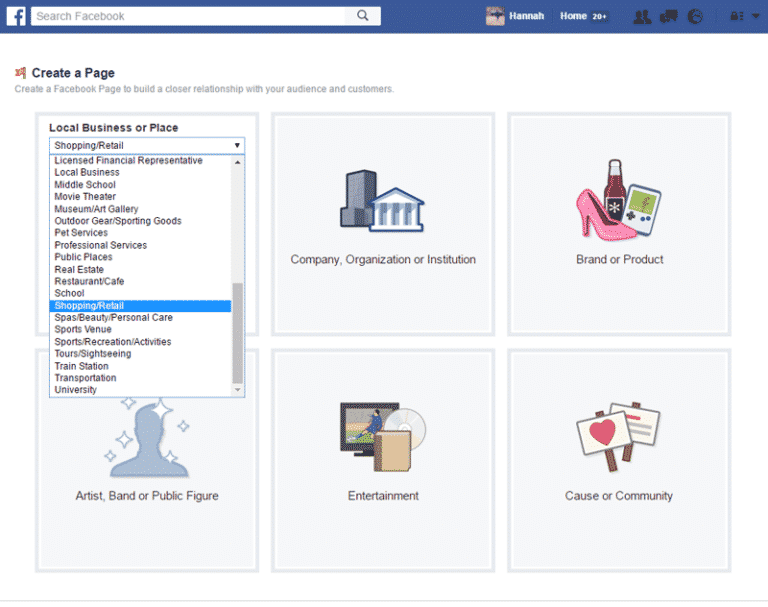
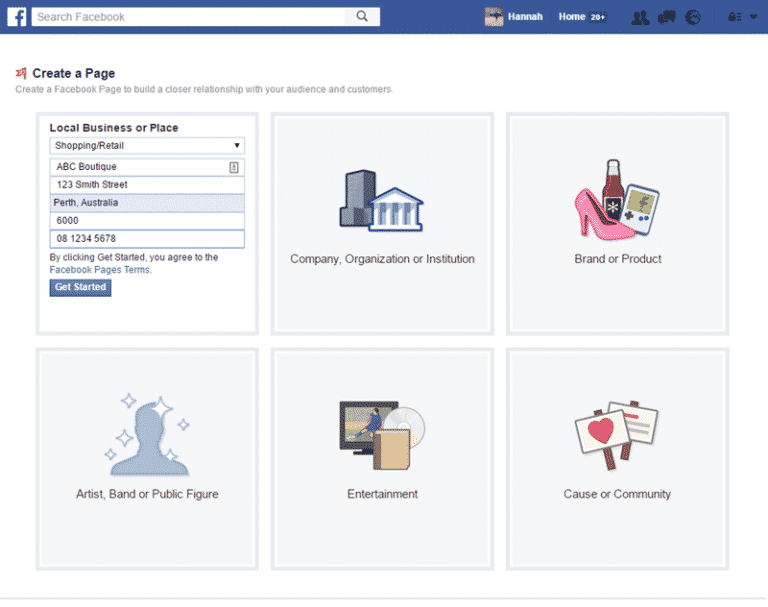
If your business falls under the “local business or place” category, you will need to enter your business category and business name as well as address and phone number. For all other categories, only category and business name are required.
3. Add Specific Details
Once you have filled out the basics of your business page, it’s time to customise your Facebook for business page.
Add a description for your business, a profile photo, and add your new page to favourites for easy access from your personal account.
You also have the option to customise your preferred page audience. This means that Facebook will attempt to reach people in your target market.
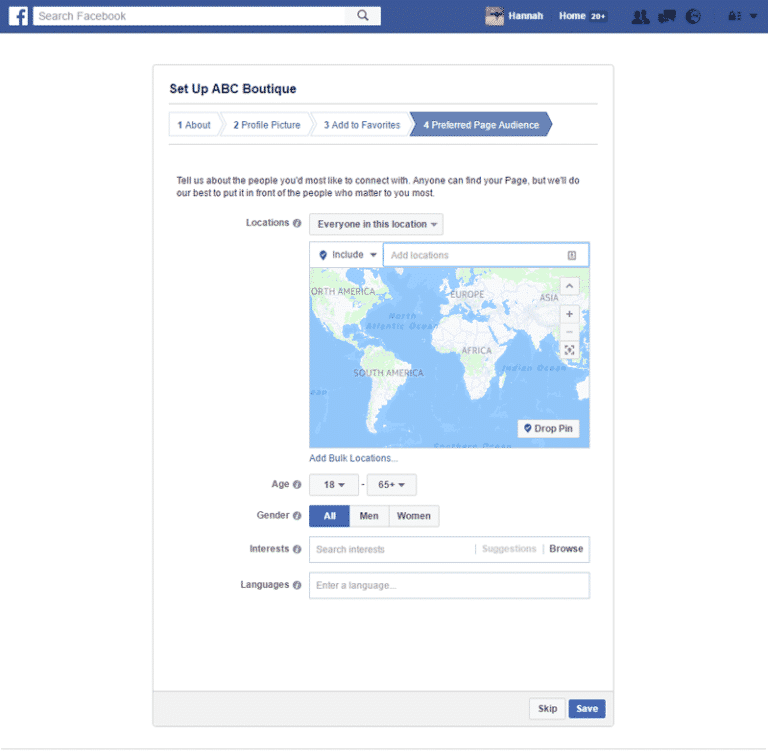
This setting is optional and can be changed at any time by going to your business page, clicking “Settings” in the upper right side and going to “Preferred Page Audience.”
4. Choose Settings
After filling out the specifics of your business page, you can choose the settings for your page.
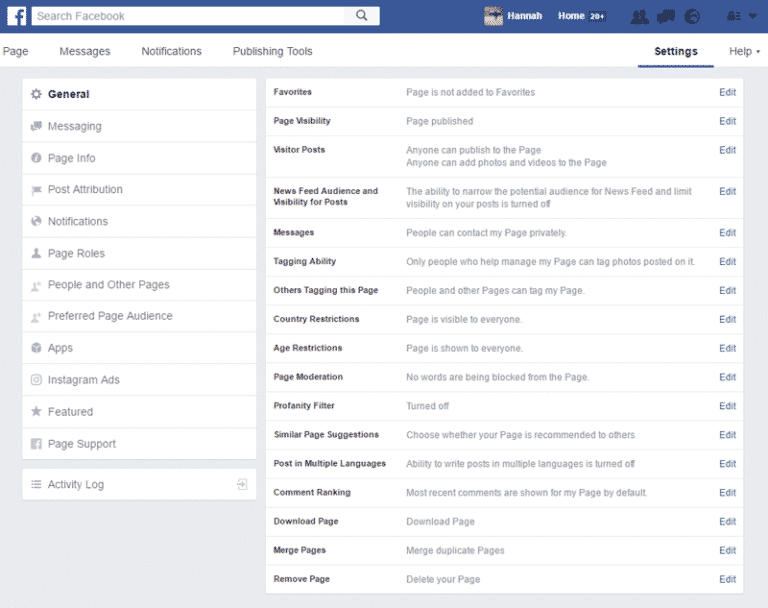
Change your settings for visibility, notifications, messaging, tagging, linked apps, and more.
If you want other people in your business to have access to your business’ Facebook page, you can appoint them as admin, editor, moderator, advertiser, or analyst under Settings > Page Roles.
If you need more help determining which settings to choose, check out these frequently asked questions for managing a Facebook business page.
5. Like, Share, Post, Network
Once your page is live and ready to go, you’re ready to improve your social media reach. Invite friends to “like” your page; share updates, photos, and statuses; and post interesting articles.
You can share promotions, host events, advertise, collect reviews, and much more on your Facebook business page. No matter your industry, Facebook can help your business meet its goals.
What’s Next?
Now that you know how to create a Facebook business page, you are ready to improve your online presence and grow your business.
For more tips on marketing your business, using social media marketing, and improving business success, check out Inbound Marketing Agency’s inbound marketing blog or like us on Facebook.